 |
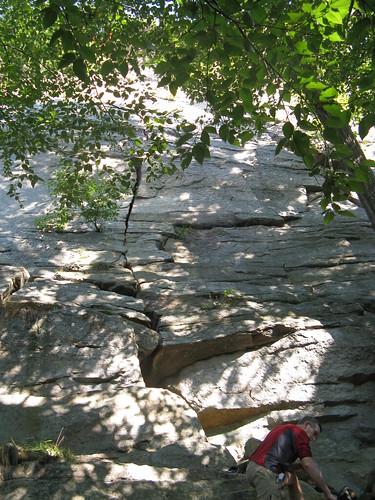
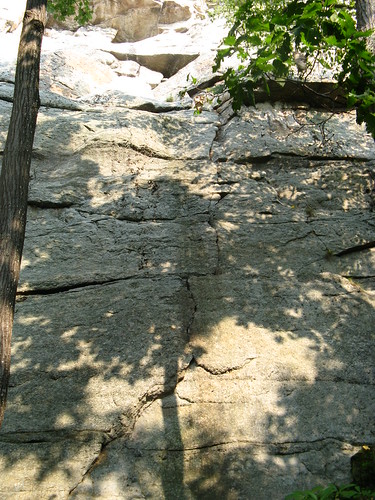
| Baby P1 |
Approach: Take the trail up left immediately before the rescue box. Stay left at the split. Baby is the crack that comes out of the broken rock at the bottom and has a pod about 35 feet up.
Pitch One (5.6) - 80 feet - Bolted anchor: Climb the broken rock up to the pod. Clear the pod (crux - a #4 camalot works really well here if you're short), and follow the crack up right to the bolted anchor on the ledge below a left-facing corner system.
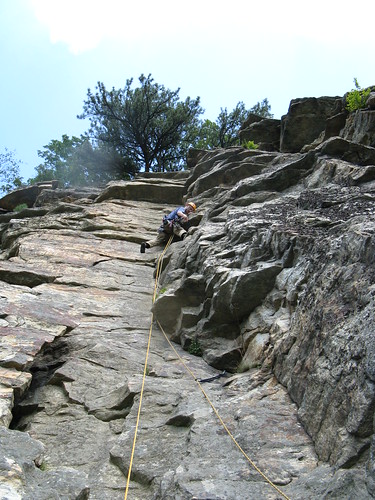 |
| Baby P2 |
Descent: Rap to the ground with two 60m ropes or rap twice with one rope from the belay tree. Be careful at the top due to all the loose rock that is up there. It is very easy to knock rocks down onto other climbers.
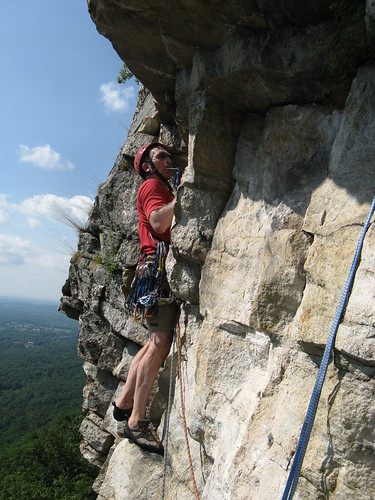
Blistered Toe (5.7) - 2 pitches - Trad - Gear anchors
 |
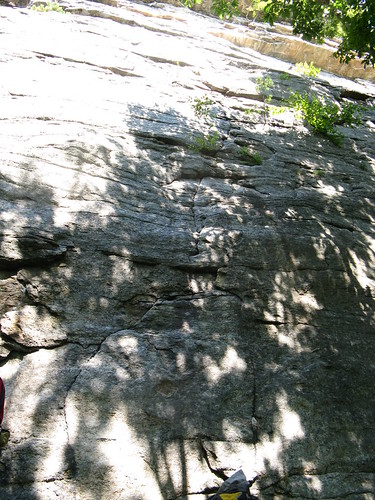
| Blistered Toe P1 |
Pitch One (5.7) - 75 feet - Trad: Due to my not having climbed past the first pitch, only the first pitch is currently available here. The direct start follows the crack straight up and is supposedly 5.9+ (according to the Williams guidebook).
For the 5.7 version, start on the left-facing flakes / edges 15 feet left of the crack, move up to a stance, and traverse right to the crack. Follow the crack straight up to the ledge. There is good gear here for an anchor if you're going to do the second pitch. If you decide to bail after the first pitch, then there are bolted anchors about 20 feet to the left on the same ledge.
Descent: From the first pitch, rap with one 60m rope off the bolts to the left. According to the Williams guidebook, if you're going to do the second pitch then there is an oak tree 30 feet to the left of the finish.
 |
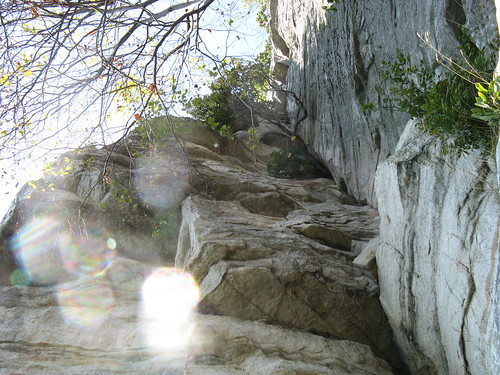
| Filipina-Boldville P1 |
Approach: Take the sixth trail after the Andrew Boulder (the boulder that is about 15-20min down the carriage trail. It is an obvious boulder because of its roof that overhangs the carriage trail). Pretty much at the top of the trail, find the right-fading, steep crack below a left-facing corner.
Pitch One (5.7) - 80 feet - Fixed anchor: Climb the steep crack to the dihedral above. Follow that to the left-facing corner above, then follow that straight up to the rap station above at a nice belay stance on the right.
Pitch Two (5.6) - 80 feet - Fixed anchor: Head straight up to the roof. Traverse left under the roof (crux) and pull around the arete. Continue traversing left to the rap station not far away. (sorry, no pic available from below the roof, but it's obvious where to go).
Descent: Rappel with one 60m rope to the ground off the P2 anchors.
 |
| Shit Creek P1 |
Approach: Take the sixth trail after the Andrew Boulder (the boulder that is about 15-20min down the carriage trail. It is an obvious boulder because of its roof that overhangs the carriage trail). At the top of the trail, head up right to a broken crack system that leads up to a small triangular roof. The climb starts just right of a thin tree.
Pitch One (5.6) - 100 feet - Fixed / Gear anchor: Climb the broken crack to the triangular roof. Traverse right (crux) and pull up to a stance. Climb up to another roof (not seen well from the ground) and a right-facing corner. Climb the corner past the roof to a good rest. Once above the roof, traverse left about 10 feet to good holds that go up a few moves. Where it becomes easiest to traverse right, do that back toward the broken-rock pillar (the feet are there, even if you can't see them at first). Belay on top of the pillar below the long roof.
 |
| Shit Creek P2 |
Pitch Three (5.7) - 60 feet - Tree anchor: Climb the path of least resistance up to the crack. Pull the crack (crux) and continue to the top. I do not have any photos of the third pitch. However, it will be obvious.
Descent: Not the most comfortable of rappels. Walk right about 40 feet to a tree on a small ledge. Two 60m ropes will get you down to a hanging belay tree that is down to your left as you descend. One rap from the tree with one rope will get you down from there. This is an awkward final place to rap from, however, so consider yourself warned.
 |
| Drunkard's Delight P1 |
Approach: Take the first trail after the rescue box and find the massive right-facing corner that is Sixish (5.4+). Drunkard's starts about 20 feet right at a right-leaning crack system.
 |
| Drunkard's Delight P2 |
Pitch One (5.8-) - 100 feet - Gear anchor: Follow the right-leaning crack (start is the crux), and follow it straight up to the roof when the crack straightens out. Belay just below the roof.
Pitch Two (5.6) - 80 feet - Gear anchor: Pull the roof and fade up left to the GT ledge.
Pitch Three (5.4) - 80 feet - Gear anchor: Climb the right-facing corner to the top.
 |
| Drunkard's Delight P3 |
Descent: Walk about 125 feet left, trending downhill to a path that leads left and down to an exposed, rocky ledge. The bolts are around the corner to the left and one cannot see them without stepping out onto the ledge and looking around the corner. Two 60m ropes will get you down to the ground, and two raps with a single 60m will get you down in two raps.

No comments:
Post a Comment