Click here for all Guidebook posts
Click here for all Cathedral posts and here for all Whitehorse posts.
Whitehorse Ledge
Inferno (5.8) - Three pitches - Trad - Gear anchors
- Approach: OK, so this is a bit adventurous, and not all of the signs, ribbons, and path markings that are mentioned in the guidebooks are still there. But it's easy to find if you're paying attention and if you're patient. At the start of the path, head left toward the next path intersection (about 40 feet from the start). At the intersection, head left on the path that would follow just above the parking lot, keeping the parking lot to your left. Follow this path (yellow blazes) for a fairly long time (longer than you'd expect - maybe 20-30 minutes). In fact, you might feel at some point that you've gone too far because you can't see the cliff any more. This is OK. Follow the path and at some point you should see yellow arrows painted on a rock (the path will split two large boulders and there will be a yellow arrow painted on each rock for people going in either direction). From there, keep following the path and look for a second yellow arrow up ahead. Head uphill about 100 feet from the second arrow to where the path levels off and begins to fade
 around to the left (and eventually downhill again). The climbers' path is right at the flat spot, just a few feet to the right beyond a flat, stone step. It is marked by two small stones on either side of the path, and it is not easily visible until you actually step a few feet into the faint trail. Once you're on it, however, it is obvious.
The start of Inferno is straight ahead at the end of the climber's path, and is the right-most face at the top of the steep path that heads down to the right. Most people scramble up this face (or the dirty and easy gully to the right) to the next ledge to start the climb (about 40 feet up).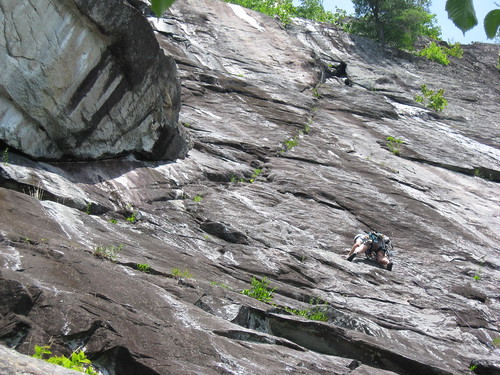 - Pitch One (5.7) - Trad - Tree anchor - 130 Feet: From the upper ledge, and standing below the massive, obvious right-leaning roof / under cling, head right, taking the path of least resistance to a short flake about 35 feet out. There isn't much pro here, but there is a fairly new piton to clip to the left of the flake. From this short flake, take the path of least resistance again up left to the point where massive roof stops going right and starts going up left. Pull the point on layback and stem moves (crux) and head up left to the tree at the ledge.
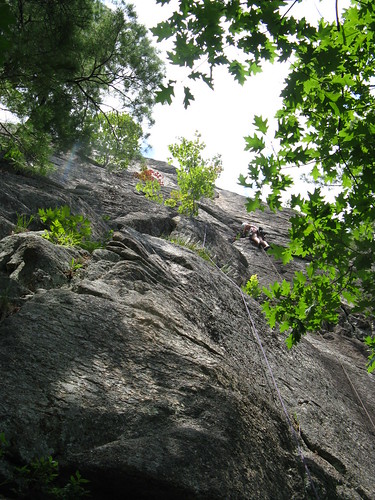
- Pitch Two (5.8) - Trad - Gear anchor - 100 Feet: Part of pitch two is the walk along the ledge to the left to the base of a broken gully below an obvious crack system. There will likely be people at the point belaying off the large tree on the edge as they come up Hotter Than Hell (see below). Climb the gully to the semi-separated block, climb the crack between the block and the cliff to the crack above to the right. Jam this crack to an obvious belay ledge at the top.
If it is crowded at this ledge, a good hanging belay can be made with small gear to left of the nice ledge at the top of the crack. The third pitch starts to the left anyway, so this may be more convenient for belaying the third pitch.
- Pitch Three (5.8) - Trad - Tree anchor - 50 Feet: Climb the crack to the top.
- Descent: Walk left across the slab to the slings on the tree. I'm pretty sure that you'll need two 60m ropes to get back to the ledge at the start of the second pitch. This lower rappel station is also further to the left from the start of the second pitch if you only want to climb the first pitch. From the lower rap station, rap with two 60m ropes all the way to the ground.
Hotter Than Hell (5.9) - Two Pitches - Trad - Gear anchors
- Approach: From the path that takes you Inferno (see above), head left until the path goes steeply uphill. You should see some bolts on the lower face that leads to a ledge about 40 feet up.
- Pitch One (5.7) - Sport - Gear anchor - 40 feet: Climb the face following the bolts on the left first then head up right the bolt on the right near the top. This pitch isn't much, to be honest, so climbing to the ledge can be a point of simply following the path of least resistance. If you want to skip this uninteresting pitch (it has a couple of fun slab moves), then it is possible to walk to the upper ledge from the path by walking uphill about 30 feet and then back to the right across the easy ledges.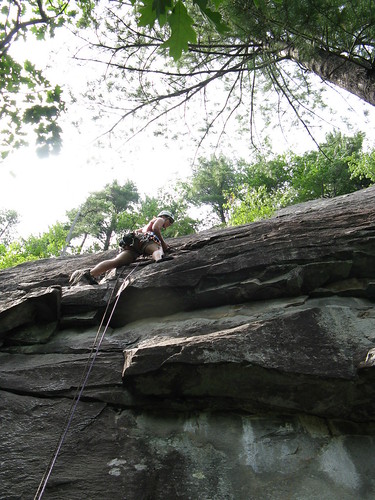
- Pitch Two (5.9) - Mostly sport (with a few trad placements) - Tree anchor - 150 feet: From the ledge, climb the block, which has an under cling flake, to the small ledge on top of the block (one can either follow the small ledges on the left or climb the notch on the right, which is easier than it looks from below). Clip the bolt and step right. Continue traversing right to the next two bolts, then follow the path of least resistance straight up past the bolts to the pod (optional belay). Clear the pod and finish up and right to the large tree at the start of the gully that makes the start of the second pitch of Inferno.
- Descent: A lot of people finish on the last two pitches of Inferno, but to descend from the Inferno ledge, walk left along the ledge to the slings in the tree (20 feet). Two 60m ropes will get you to the ground.
Cathedral Ledge
Toe Crack (5.7) - Two pitches - Trad - Gear anchor
- Approach: Follow the signs to the Thin Air face. When you get to the cliff (you should be at the Mordor Wall), head up the steep steps to the left. There are two different places to start Toe Crack: head up the easy, dirty dikes at the start of Standard Route to a small tree ledge at the base of the crack or; start on the easy, right-fading ramp further uphill and traverse on the tricky ledges right to the same tree ledge that the dikes leads to. If the rock is dry, then climbing 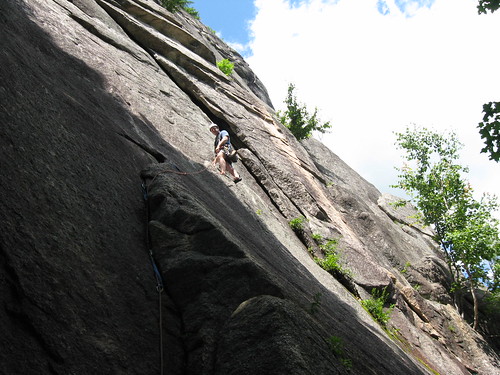 the dikes lower down the path is recommended (though the slab about 30 feet up is still tricky). If it is wet, then the traverse is recommended. The picture for the first pitch shows the traverse.
- Pitch One (5.7) - Trad - Gear anchor - 60 feet: Climb up the easy ramp to the top. Walk right along the top to the next set of ledges. Either step up high and walk along the next two ledges (tricky and mentally tough to step across due to a lack of hands - requires good balance!) or stay low and smear right to the wide crack. If you stay low, then climb up the wide crack on the right and make the tricky step right to a small flat ledge around the corner (if already high up, then simply make the same tricky step right). From there, use the side pulls to get a better angle at jamming Toe Crack (you won't be able to see it, but you'll be able to feel it - a #1 Camalot protects well in there if you need to make a blind placement), then carefully down-climb to the ledge.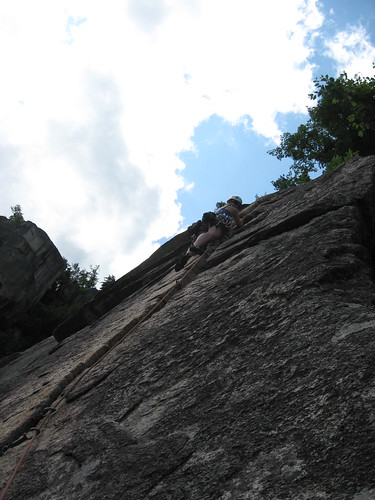
- Pitch Two (5.7) - Trad - Gear anchor - 130 feet: Follow the crack up to the tree ledge that is up the gully (watch out for loose rocks) to the right of the arrete.
- Descent: Rap with two 60m ropes to the ground. Many people follow the Standard Route to the top (not recommended). Can also finish on Repulsion (5.8+) (following the arrete) or Thin Air (5.6) (see below).
Link-up from Toe Crack to Thin Air - Two extra pitches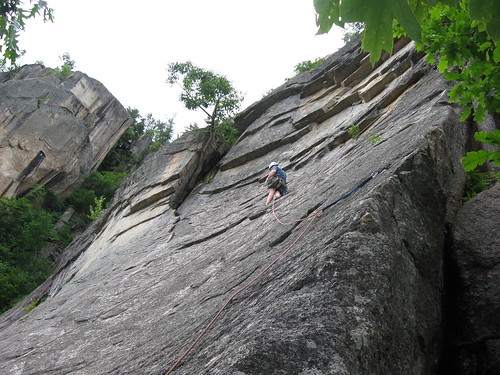
- Pitch Three (5.4 R) - Trad - Gear anchor - 100 feet: From the Toe Crack anchor, head up the arrete and clip the bolt about 20 feet up. Climb up to the decent ledge above the bolt and begin the long, run-out walk along good ledges to the left. There's no gear between here and just below the blocky corner that you're heading toward. Watch out for the large, loose flake below the blocky corner (usually marked with a large "X"). Gear can be placed in the flake below the loose block, however. Step left to the small ledges on the left of the loose block and climb straight up to the top of the block corner to an obvious and very nice belay ledge.
- Pitch Four (5.6) - Trad - Tree anchor - 160 feet: Climb straight up above the ledge toward steeper rock. Stay left at the steeper rock (crux) and follow the path of least resistance up to the dirty gully. Either climb the mentally difficult slab on the right or climb the much easier gully to the left (most climb the gully) to the ledge.
- Descent: Most people walk off to the right (and some hitchhike down the long, tarred road). However, if you're feeling brave, then belay one another left along the steep and often wet (read: slick) slab to the anchors at the top of the Saigons. Two 60m ropes will get you back to the path this way (I believe two raps can be made with one 60m rope, as there are anchors at the top of the first pitch of the Saigons). However, this is often wet and slick, and it may not protect well, so beware.

No comments:
Post a Comment